Easy Rose Paper Ideas
Posted by Olivia Sum on
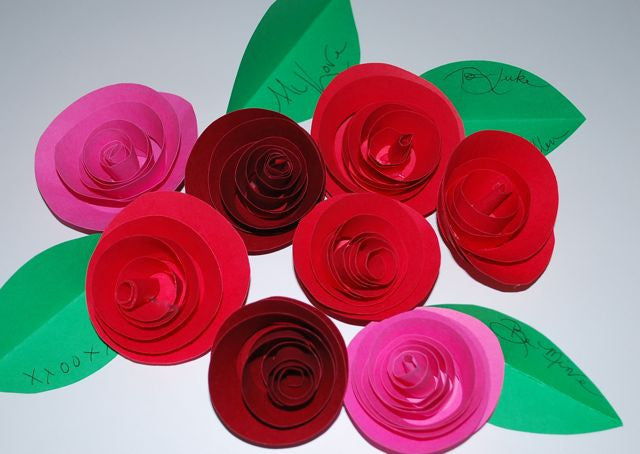
There are so many different ways you can use scrapbooking paper. A number of different creative projects can be completed using it. Some people use scrapbook paper to decorate their homes and others make business cards with them. They can be used to form paper flowers with rose paper patterns.
Many are easy to do from home with very few supplies required. You can get scrapbook paper for fairly low prices. Anyone, regardless if they are scrappers, can find amusement in these arts and crafts while adding a new look to their home. Rose paper comes in a variety of colors, shades and patterns.
DIY Rose Paper Projects

You can create beautifully decorated clothespins using just a few simple supplies: rose papER, white glue, wooden clothespins, a paint brush and a straight edge razor. You can find this project on a number of crafting sites, and it’s growing in popularity by the day! It can make laundry much more fun. The steps are simple, too. Simply make strips from the rose paper using the clothespin. You can make the straight strips using the straight edge. Paint the glue onto one side of the pin, and firms press the strip onto it. Brush the top with more glue. Do the same on the other side and let it dry. The end result is a pretty clothespin.
Add some pizzazz to your dresser drawers with rose paper and some glue. You’ll probably need about 3 sheets of rose paper, depending on the size of your dresser. Paint the bottoms of the drawer with glue, and press the rose paper firmly against the bottom. Hold to ensure the sheets don’t slide around and to make sure it dries appropriately. When you’re done, you have a creative and adorable dresser drawer.
You can make some paper flowers using rose paper, an old newspaper, some glue and tape, a pair of scissors and some buttons. These are a lot of fun to craft, especially for children. Take two sheets of rose paper and glue them together. This makes sure that all sides of the paper have the rose pattern. Once it dries, cut out medium, small and large petal shapes. Cut a 2 inch wide strip of newspaper, cutting perpendicular cuts down the line until ½ an inch from the bottom. Roll the newspaper and glue it securely to create the inside of the flower. Glue the small petals in place and affix them with tape, and fix the button into the center with glue. Do the same for the rest of the petals and enjoy your bouquet!

Create a ring holder for your jewelry using rose paper, an xacto knife, an emory board, a glue stick, ¼ inch of foam board and a ruler. Your first step is to trace the outline of your hand onto the foam core board. Cut the shape out of the foam using the xacto knife, which can prove to be difficult unless you use the emory board to soften the edges. When you’re cutting, leave 1/8 inch of space between the fingers to ensure that the rings would fit.
Trace the foam core hand on the rose paper, and cut the shape from the paper. Trace it again for the backside, and cut the shape from another piece of rose paper. Create a support beam using a nearly 90 degree triangle made from the foam board that stands about halfway up the hand. Don’t let the support be a full 90 degrees, as that can cause the hand to tip over. Trace and cut out the triangle on the rose paper to ensure you can cover it in the paper. First, glue the rose paper to the hand itself. Second, glue the paper onto the triangle. Finally, glue the triangle to the hand on the back. When it’s all dry, you can add your rings and place it near your jewelry box or sink!
Use rose paper to create patterned paper fans. You only need rose paper, a straight edge razor, a stapler, glue, scissors and chopsticks (or a similar stick). Fold the sheets of rose paper accordion style using ½ inch folds. Once you’re done, fold it in half and staple the middle. Use the scissors to cut a 45 degree angle at each corner and glue the fold together. Repeat to create a second fan, and glue them together. Add holders with the chopsticks, and glue them on. The end result? Beautiful fans for a summer party.
