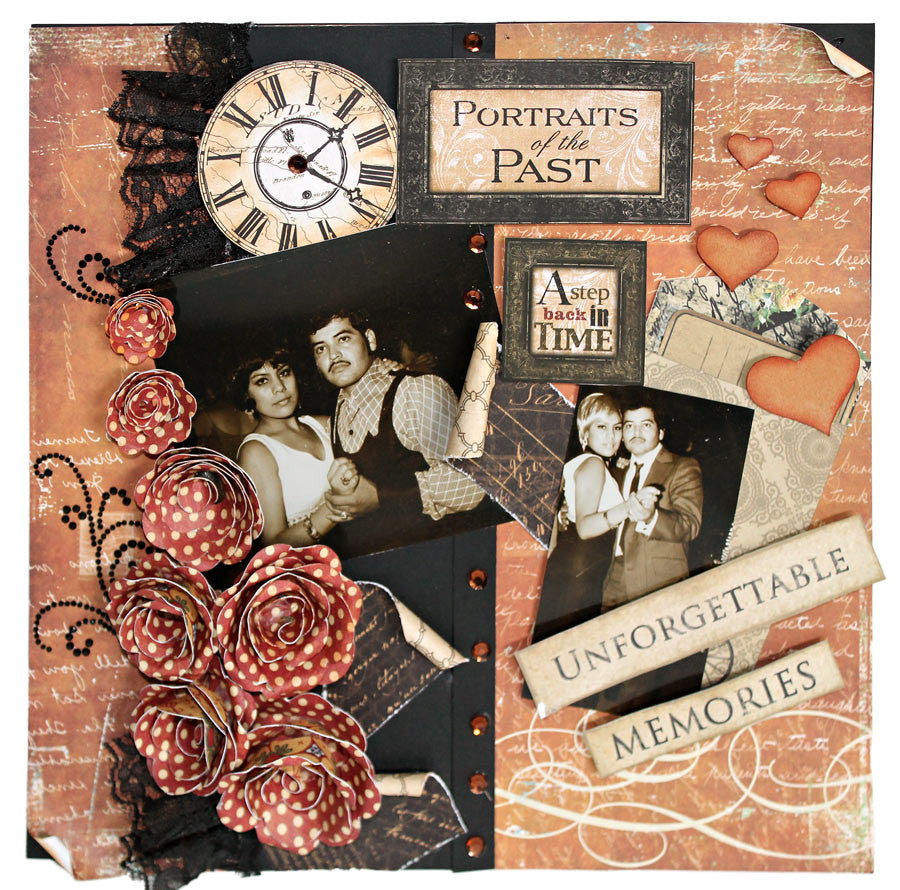
CREATE A VINTAGE SCRAPBOOK LAYOUT THAT LOOKS RUSTIC!
Posted by Olivia Sum on
One of the hottest trends in scrapbooking is creating a vintage style scrapbook album.
If you attend a scrapbooking party or a demonstration, there’s a good chance that you’ll get to see some inspiring vintage scrapbook layouts. To get a jumpstart on creating your own vintage scrapbook, here are some steps to help you get started.
CHOOSE YOUR PHOTOS
When vintage scrapbooking, either choose photos that are truly vintage, meaning the old black and white photos, or transform the look of your current photos to appear vintage.
You can also get a cool app like “instagram” for your iphone, this way you can take photos and then apply vintage filters to make them look old in a matter of seconds. I like to change my photos to sepia or black and white to get that vintage style look.
If you opt to use current photos, include props that will give the appearance of authenticity. For example, if you’re taking a photo of your young children then include antique toys rather than today’s legos or baby dolls. Keep the background simple in the photo as well. Try not to include modern day items such as a flat screen, a computer or a microwave.

SELECT VINTAGE PAPER
You’ll find a good assortment of vintage scrapbook backgrounds at your craft store. For instance, you might choose a black and white background that has a pair of vintage white gloves as the main focal point or a background with an antique car.
Another great option is to use sample wallpaper. Quite often when a store gets in new stock, they get rid of their old sample wallpaper books. Talk with the manager and you may be able to get the book for free!
Although these pages are smaller than the standard 12×12 scrapbooking page, you can still use a page as a portion of your background. A lot of the pages have a vintage appeal and will add texture to your scrapbook page. If you are going digital then try the chalkboard paper which you can download here!
Be very selective in regards to colour as you as you design your vintage scrapbook layouts. Think in terms of old fashioned and not bright and bold. Adding a little colour as an accent is fine, but don’t let a colour overpower the page. The majority of the page should be neutral, brown, grey or green.
If you enjoy digital scrapbooking, you can find a wide assortment of vintage scrapbook pages. You just need to scan your photos, choose your embellishments, and then download.
CROPPING PHOTOS
With vintage scrapbook layouts, you need to use clean lines. Many of the old photos were rectangular or square in shape. Some of the professional photos were oval in shape. Use similar shapes—this isn’t the time to get creative with zigzag lines and such. Use templates for cropping your photos.
Use the same matting for all of your photos that you’ll be using for a given spread. For an authentic look, use brown, grey or dark green for matting. These are the colours that were used a lot when the photos were originally taken. For a special added touch, first mat with a narrow cream colour border and then a wider mat out of the grown, grey or green.

ADD EMBELLISHMENTS
Just as you want your photos and backgrounds to have a vintage look, you need to do the same with your embellishments. Here are some ideas that will work well as you create a vintage style scrapbook:
- A flat brooch
- An advertising label from an old food can
- Antique looking ribbon
- Lace
- Old black and white postcards
- Old buttons
- Old cancelled postage stamps
- Old certificates
- Old greeting cards
- Old worn out recipe cards
- Package of vintage stickers
- Rubber stamps that have old fashioned flowers
- Scrapbooking charms
- Tattered love letter
- Word or phrase stickers
As you’re out and about, stop at local thrift shops and garage sales to look for items that can be used as embellishments. You might be able to get some good finds!
Share this post
- Tags: classic, colour, scrapbook-ideas, scrapbooking, tutorial, vintage
